Today I spent the whole day painting the shanny, following on from yesterday's progress. I have added some detailing to the head, working on the eye and mouth in particular.

Then onto the body and working on the motley patterning I roughly mark in the darker patches along the body. In my reference photo's I haven't got a good continuous photo of the body length showing the markings... so I have studied several photo's from various fish with slightly different patterns of dots and splodges. Seems they are variable so, hopefully, I got the gist of what the pattern is generally and have can reproduce something that is shanny-like.

I continue the darker spots and splodges to the caudal fin (tail) and down below the lateral line on the side of the body. I am putting in a few markings on the area where the pectoral fin will be, but not too many as most of this will be painted over opaquely so no point adding detailing there. I also add in some intermediary colour to the body between the main patches of spots, this is a darker green grey mix. It's a soft colour that just ties things together and I also add a few splodges of much lighter beige to the top of the body in the lighter areas of body markings.

Now I add the rays of the pectoral fin.

Then add on the darker spots and paint in the translucent skin of the fin using a very thin wash of pale blue and also one of a warm yellow. I add a few highlights to the rays and work the spotting in.

Close up of the finished pectoral fin. You will notice that my detailing is not particularly fine in that I haven't tried to paint in the spot shapes perfectly. This illustration is much bigger than the image on the sign will be seen at, so in the process of reduction these 'rough edges' will disappear to the human eye, being too small to see well, but still giving the image its detailed look.

Onto the dorsal fin which though essentially looks like two fins is actually a continuous right along the top of the body. I paint the rays in... the first set of rays are like spines and the ones in the second part of the fin are softer. I take the patterns of dark and light again from an amalgamation of several images, seeing what the general patterning is and trying to paint something similar.

Then once the spines are in I add the translucent skin between again using two washes one of a soft blue and one of a warm yellow.

Dark patterning is added to the tail, taking the same approach with the reference material as I have done with most of this fish.... studying all the photo's and working out a general theme of pattern, colour and hoping my experience can pull it together.

Next.. the fin that runs along the underside of the body... this is the hardest fin to do as most of the photo's I have do not show this fin... I have a few photo's showing a small part of it, or showing the whole length but the fin is not splayed, and just one or two that show the fin but have completely different light on it and different colours... one has no pattern and the other a hint. So again it's a case of taking a best guess at what it is from the reference I have available. When I take this to Jonny to be checked I can discuss these issues with him and correct it if necessary .

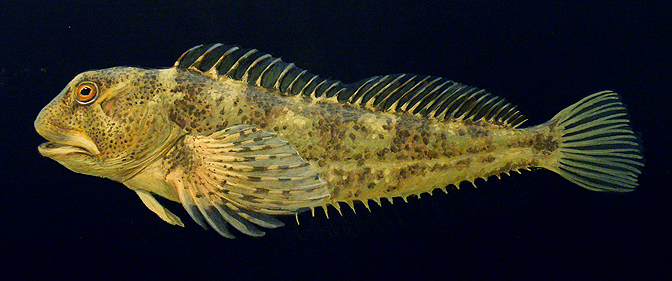
Once the fin is done the fish is finished at this point and now ready to be checked by the animal department... I hope to be able to take this to Jonny tomorrow for his expert eye to be cast across it.

No comments:
Post a Comment